
Launching and Accessing AWS EC2 Instances
Table of Contents
The Amazon Elastic Compute Cloud (AWS EC2) is a robust web service offered by Amazon. It provides secure and scalable compute capacity in the cloud, tailored to streamline web-scale cloud computing for developers.
Launching an AWS EC2 Instance
Setting up your AWS EC2 instance is a straightforward process. Follow the steps below to launch your server:
- Navigate to Amazon AWS official website.
- If you haven’t registered yet, sign up for an account.
- Once logged in, select EC2 under the Compute section.
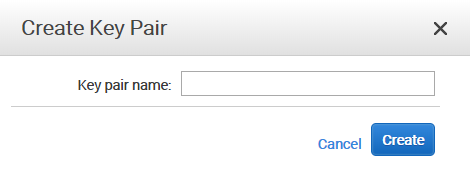
- Before initiating your server, you’ll need a Key Pair for post-launch access. AWS typically prompts you to create one during the launch, but let’s create one in advance. Under Resources, select Key Pairs.
- Click on Create Key Pair.

- Name your key and click Create.
- A prompt will appear to save a .PEM file. Note: This file is crucial. Store it securely in multiple locations, such as your computer, an external drive, and a cloud storage service like DropBox or Google Drive.
- Return to the EC2 Dashboard and select Launch Instance to initiate your AWS EC2 server.

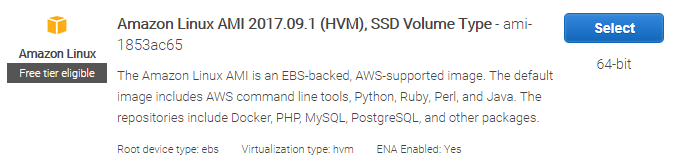
- Select your desired server and operating system. For this guide, we’ll choose the first option due to its compatibility with PHP and MySQL repositories.
- Choose the specifications based on your requirements. For demonstration purposes, we’ll select the t2.micro type.

- Proceed through the configuration steps, adjusting settings as needed for your specific use case.
- When configuring the Security Group, decide if you want your server to be public. If so, name your security group and add the appropriate rule.

- Review your settings and click Launch.
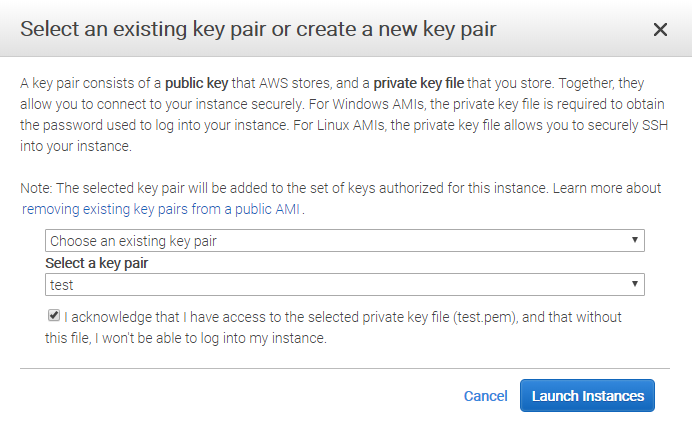
- At this stage, you’ll use the Key Pair created earlier. Choose the key pair name, acknowledge the terms, and click Launch Instance.
- Wait a few moments. Once the status indicates “2/2 checks passed” and the instance state is “running,” your server is operational.
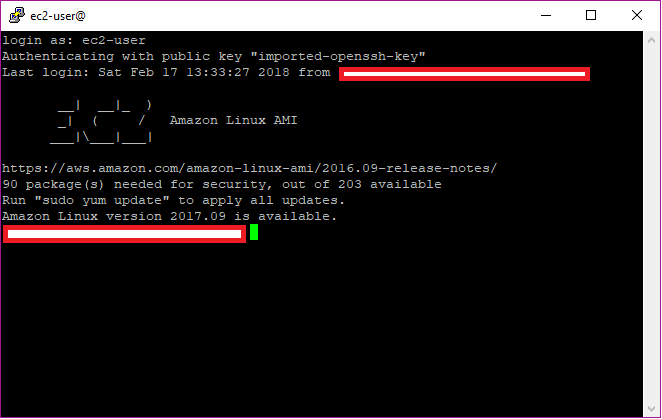
Accessing AWS EC2 Server via SSL with PuTTY
To securely access your server using SSL, PuTTY is a recommended tool. Here’s how:
- Download and install PuTTY.
- In AWS, select the recently created instance. Note the Public DNS (IPv4) or IPv4 Public IP for later use.
- Launch PuTTY and input the noted link into the Host Name (or IP address) field, retaining port 22.
- In the navigation panel, navigate to Connection > SSH > Auth.
- Select the downloaded ec2-user file by clicking Browse under Private key file for authorization.
- Click Open and log in using “ec2-user” as the username.
- Once logged in, you have successfully accessed your server.
Accessing AWS EC2 Server via FileZilla (FTP)
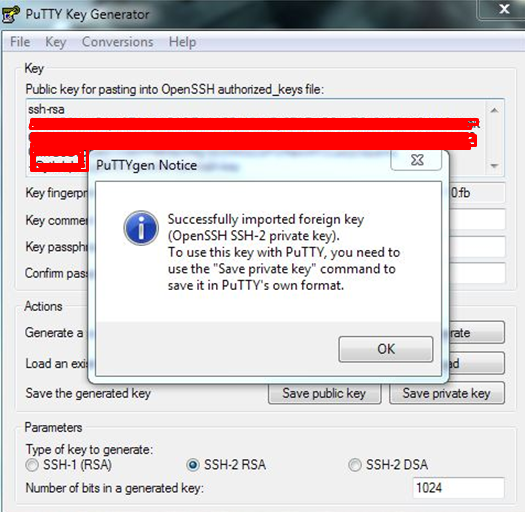
For file transfers, FileZilla offers a user-friendly interface. However, it requires a PPK format for the Key Pair. Let’s first convert the PEM file to PPK:
- Download the PuTTY Key Generator.
- Launch puttygen and click Load to select your PEM file.
- After conversion, click Save Private Key. A passphrase is optional but can enhance security.
Now, to access your server via FTP:
- Download and install the FileZilla Client.
- Launch FileZilla.
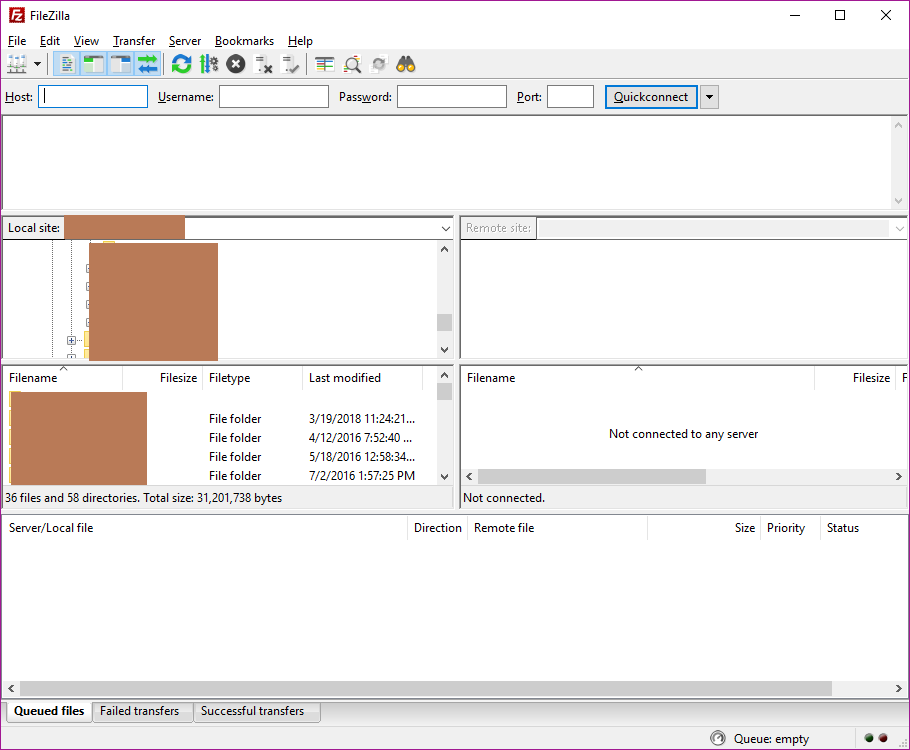
- Navigate to File > Site Manager and click New Site.
- Name your connection and input the AWS URL or IP in the Host field.
- For protocol, select SFTP – SSH File Transfer Protocol and set Logon Type to Key file.
- For the user, input ec2-user and select your converted PPK file for the key file.
- Click OK and connect to your AWS server. To upload files, navigate to /var/www/html.
Essential AWS Server Insights
- Costs vary based on server usage. For detailed pricing, refer to the Amazon EC2 Pricing page.
- Store your .PEM file securely in multiple locations to prevent loss.
- Restarting your instance may change the Public DNS (IPv4) and IPv4 Public IP. To maintain a consistent IP, consider assigning an elastic IP.
Conclusion
AWS EC2 offers a flexible and secure cloud computing environment. By following this guide, you can efficiently launch, access, and manage your EC2 instances. Ensure you keep your Key Pair secure and stay updated with AWS’s best practices for optimal performance and security.
Also, here is a post about Create WHM cPanel on AWS Step by Step

Husain Alhaboubi is Director of Digital Channels at Mobily, where he leads platform optimization, AI-powered customer engagement, and UI/UX strategy. With 20+ years of experience spanning eCommerce, IT infrastructure, and digital marketing, he previously drove a 225% revenue increase and 69% organic traffic growth as eCommerce Senior Manager at flyadeal, and managed enterprise IT operations — including data centers, ERP systems, and network security — as Group IT Manager at IPD Group.
Husain holds a BS in Information Systems from the University of Texas at Arlington and is certified in Google Ads, Google Analytics, and Semrush SEO. He writes from hands-on experience across both sides of digital business: the strategic (eCommerce, SEO, AI, digital transformation) and the technical (server administration, cloud computing, web development, networking, and security) — with a particular focus on the Saudi market and Vision 2030. Read his full resume →